IOS:
- Navigate to and open the “App Store” Application.
- In the search bar, Search “Xplor Pay Mobile”.
- Download the application.
- Once the download is complete, navigate to the “Xplor Pay Mobile” Application and open it.
- Once Opened, Merchant will be prompted to login, use the merchant’s Clearent/New merchant home login. Once logged in, they should have full access to the app.
ANDROID:
- Navigate to and open the “Google Play Store” Application.
- In the search bar, Search “Xplor Pay Mobile”.
- Download the application.
- Once the download is complete, navigate to the “Xplor Pay Mobile” Application and open it.
- Once Opened, Merchant will be prompted to login, use the merchant’s Clearent/New merchant home login. Once logged in, they should have full access to the app.
XPLOR PAY MOBILE APP USE INSTRUCTIONS:
LOGGING IN AND SELECTING MERCHANT AND TERMINAL
- Click on the XplorPay Mobile app icon.
- A prompt “XplorPayMobile” Wants to Use “clearent.net” to Sign in” will pop up. Click Continue.
- In the screen that pops up, sign in with your Username and password for your account. Click “Sign in” once you are ready.
- You will see a page that says “merchant & Terminal selection”. Click on the blank space under “Merchant” to be taken to a search bar.
- Search for your Merchant account, click on that account.
- You will be taken back to the “Merchant & Terminal selection” Page. Wait a few moments and an available terminal will automatically populate under “Terminal”.
- Once the “Merchant” and “Terminal” values are filled, click “Next” on the bottom.
TAKING A PAYMENT
- Click on the “Payment” tab in the lower left corner of the app.
- Input the amount you want to charge.
- Select The way you want to pay- either “card reader” or “manual entry”.
- Then hit Charge and follow the instructions to complete a payment.
CONNECTING A BLUETOOTH READER
- Charge the reader
- Connect the reader to a power source.
- Download the Xplor Pay Mobile App
- (IOS) – “Insert QR code”
- (Andriod) – “Insert QR code”
- Open and Log into the Xplor Pay Mobile App
- If you have problems with this step please refer to ____ and contact___ for more help.
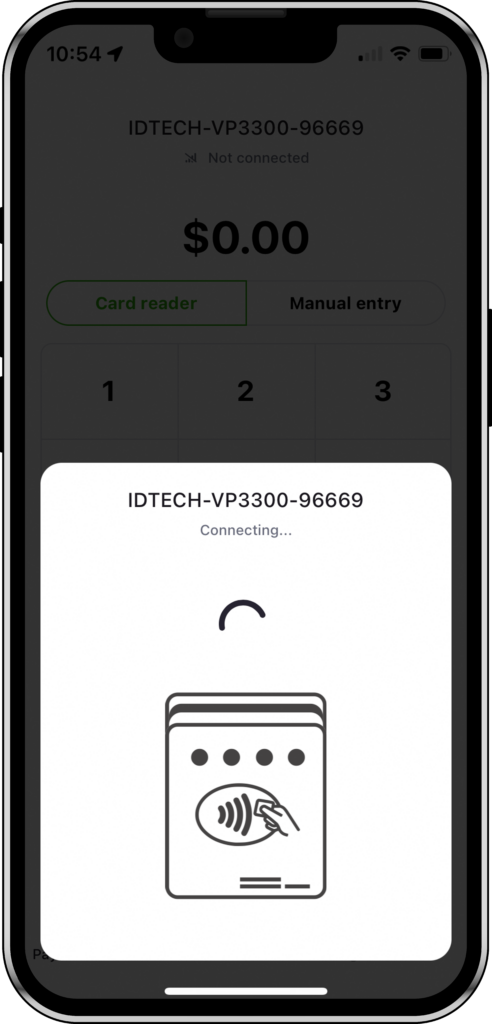
- Pair the reader
- With your phone or tablet
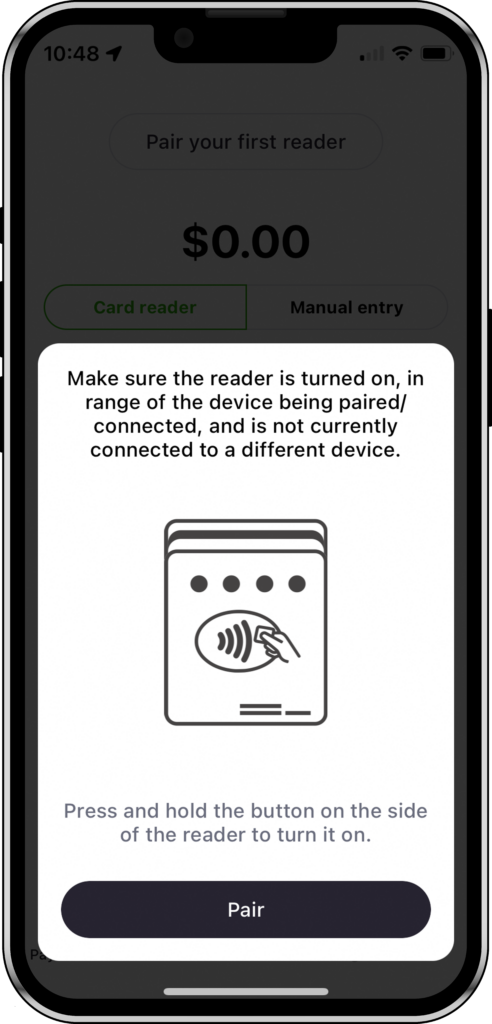
- Under the Payment tab, press the “Pair your first reader” button.
- After reviewing the prompt, press “Pair”.
- On your reader, press the power button on the right side and wait for the top blue light to flash.
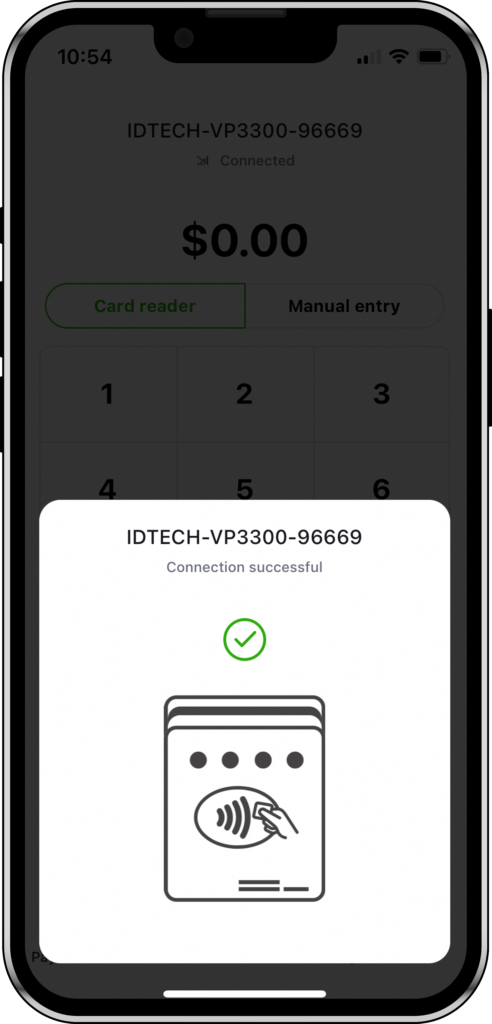
- Select the your reader, then wait for it to connect Complete! You are all set and ready to use the Xplor Pay Mobile App.
- With your phone or tablet
- Complete! You are all set and ready to use the Xplor Pay Mobile App.
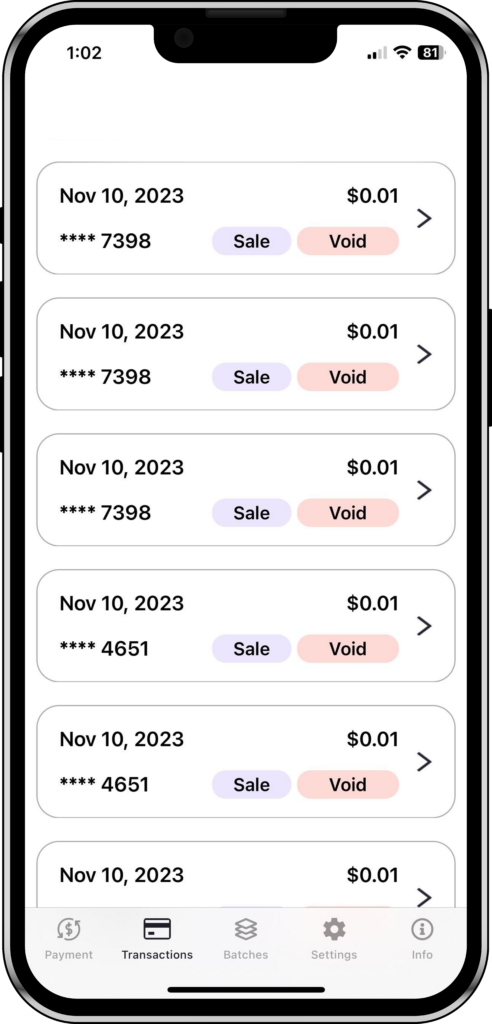
VIEWING/VOIDING/REFUNDING TRANSACTIONS
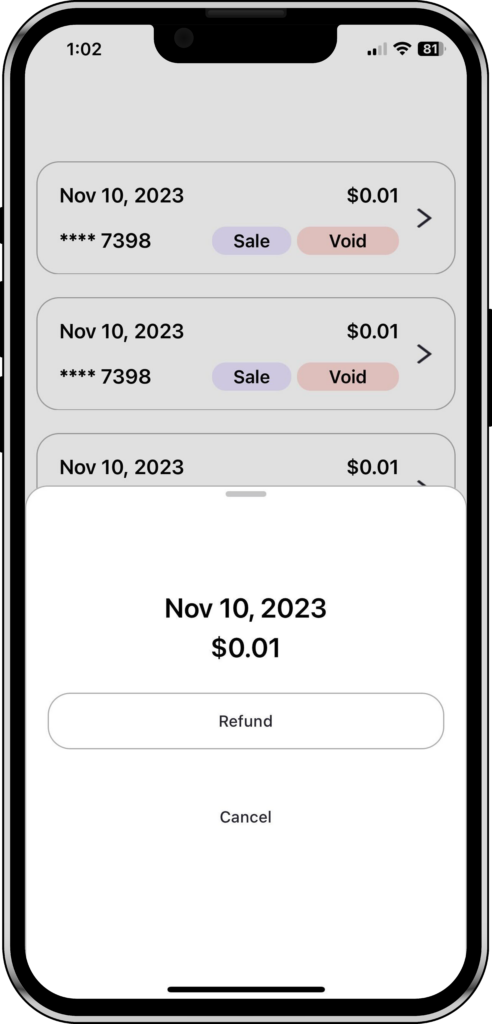
- Click on the Transaction tab on the lower left corner of the app to see your transactions.
- To refund, click on a transaction that is marked “settled” and click refund.
- To void, click on a transaction that is marked “open” and click void.
VIEWING BATCHES
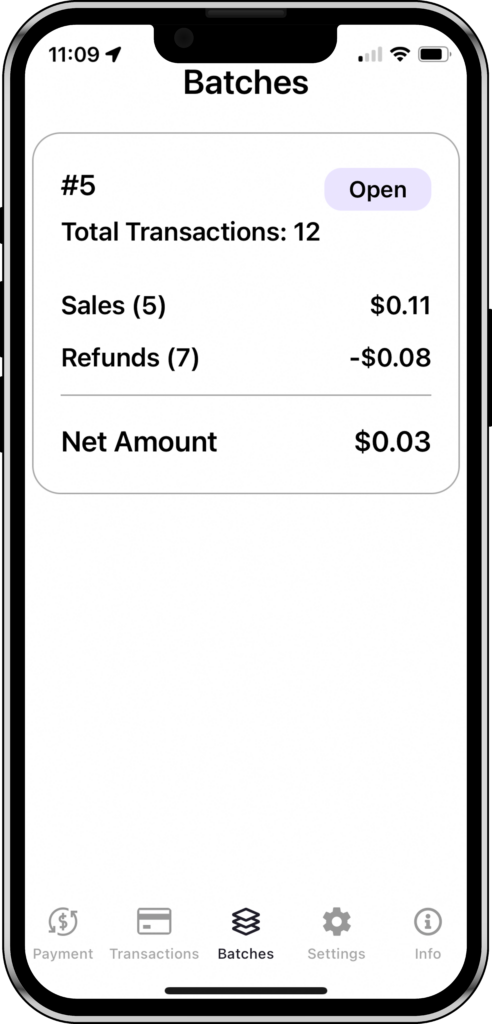
- Click on the Batches tab in the lower middle part of the screen.
- You will be able to see the Total, Sales, Refunds, status, and net amount of the current Batch.
SETTINGS
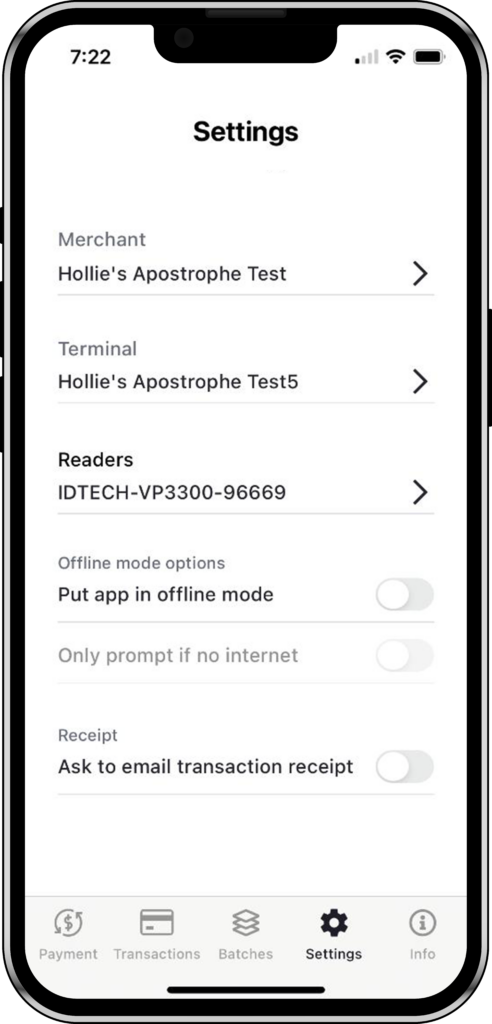
- Click on Settings on the lower right corner of the screen.
- To change “Merchant” or “Terminal” selection, click on the value you want to change, and search for the “Merchant” or “Terminal” you wish to access.
- To look at Bluetooth reader settings, click “Readers”. Select the reader you wish to view or select “Pair new reader” and reference instructions above for setup.
- To put app in Offline Mode. Click “offline mode options” and toggle “put offline mode slider from grey to green.
- To ask email for receipts, Toggle “Ask to email transaction receipt from grey to green.
INFO
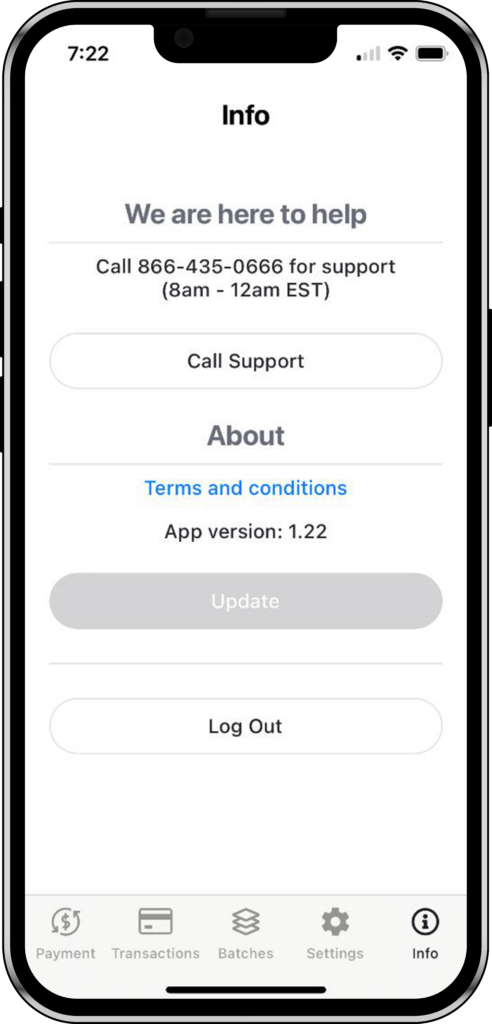
- Click on Info from lower right corner of screen.
- Click Call support for easy access to Xplor Pay Mobile’s support team.
- Click Update to update your app to the most updated version.
- Click Log out to log out of the app.
ADDITIONAL INFORMATION
- Setting up/Changing Tip
- Call into support to get further instructions on how to toggle in Virtual terminal.
- Call into support to get further instructions on how to toggle in Virtual terminal.
- Naming your Bluetooth Reader
- Click on the “Settings” tab.
- Click on the “Readers” section.
- Click on the reader you wish to name/rename.
- Click on “customer reader name” and add the name you desire.
- Unpairing a Reader
- Click on the “Settings” tab.
- Click on the “Readers” section.
- Click the reader you wish to unpair.
- Click the red “remove reader” button on the bottom of the page.
- Running a Manual Input Transaction
- Click on the “Payment” tab.
- Click “manual entry” on payment page.
- Input amount you wish to charge on the keypad.
- Click “Charge”.
- Input credit card details and click “confirm” to run the transaction.
- Toggling Signatures
- Call into support to get further instructions on how to toggle in Virtual terminal.
- Call into support to get further instructions on how to toggle in Virtual terminal.
- Enabling and Running Offline Transactions
- Offline transactions will automatically be enabled if connection is lost, to enable it manually because of a unstable connection, follow these steps:
- Click on the “Settings” tab.
- Under “Offline mode options” switch “put app in offline mode”.
- Read the prompt that pops up and click “yes” to be placed in offline mode.
- Offline transactions will automatically be enabled if connection is lost, to enable it manually because of a unstable connection, follow these steps: