Summary
With the Clearent Virtual Terminal (VT), merchants can accept credit card payments using the web browser on a computer, tablet, or mobile device. In this guide, you will find step-by-step instructions for using the Virtual Terminal.
In this guide you will learn how to:
- Sign In
- Accessing the VT
- Take a Payment
- Receipt Options
- Void a Transaction
- Refund a Transaction
- Identify Pending Authorizations
- Process Recurring Payments
- Process Ad-Hoc Card on File Payments
- Viewing & Modify VT Settings
- Virtual Terminal DEMO Video
Signing into the Merchant Portal
- Access the Merchant Portal Virtual Terminal from https://my.clearent.net and enter your credentials to sign in.
- Click on Forgot Username/Password to locate your username or reset your password,
Note: Your Clearent username also works for Compass. Changing your password in one place changes it in all going forward.

Accessing the VT
- Once you have signed into the Merchant Portal, select your Business (MID) from the drop-down menu or enter a new one, if different from the last one you viewed.
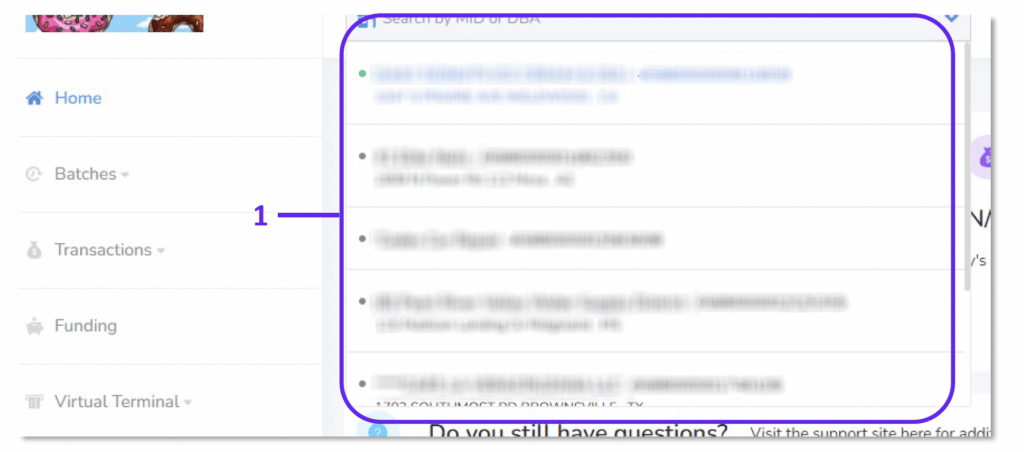
- Click Virtual Terminal in the navigation to view the pages within the VT section, then select the page you’d like to access.

Take a Payment
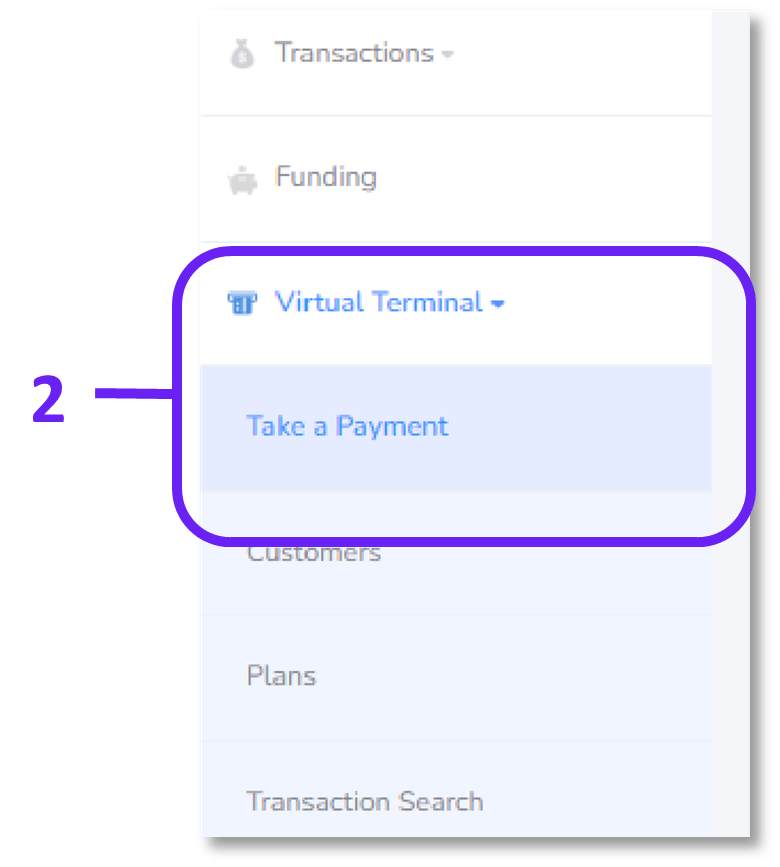
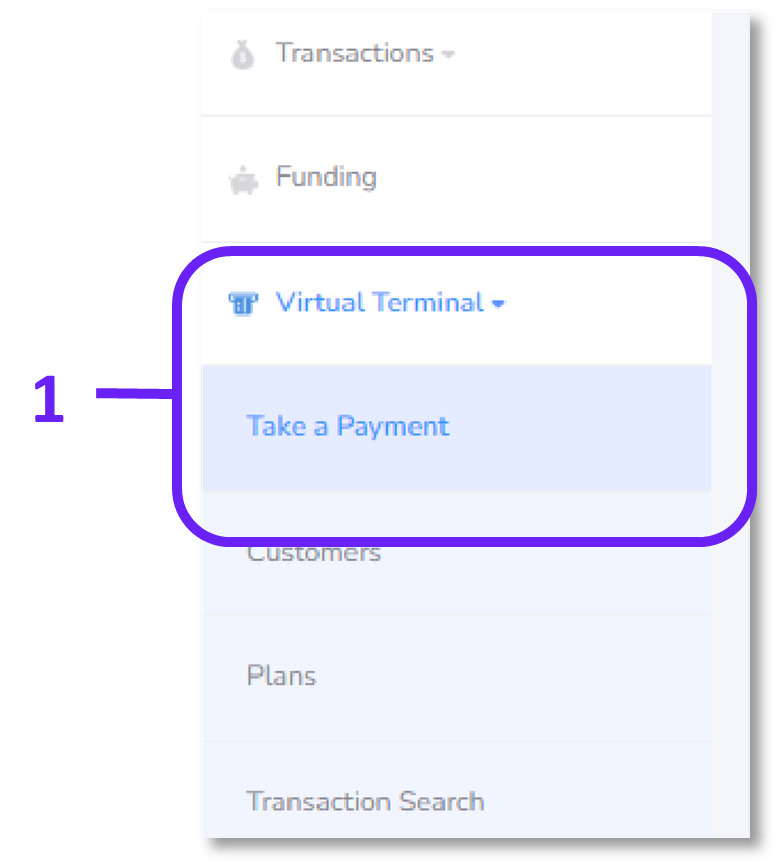
- After you sign in, select the MID, if different than the one selected.
- Select Take a Payment from the Virtual Terminal section in the navigation.
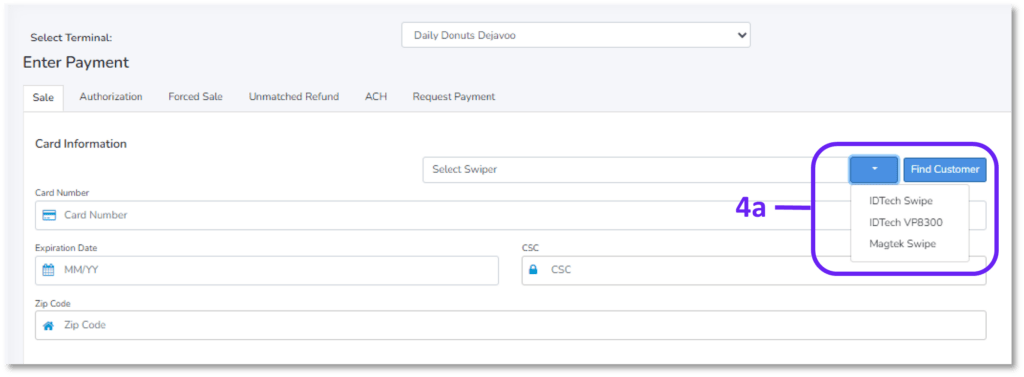
- Select the TID, if different than the one defaulted.
- For credit card transactions, select the transaction type tab (sale, authorization, forced sale, unmatched refund) that you want to complete.
- Please note, the transaction type options shown are based on the level of access the user has.
- For Sales and Authorizations, if you have a device or peripheral connected, select the swiper to gather the credit card information. Once a swipe option is selected (shown in the image), the device or peripheral is ready to use.
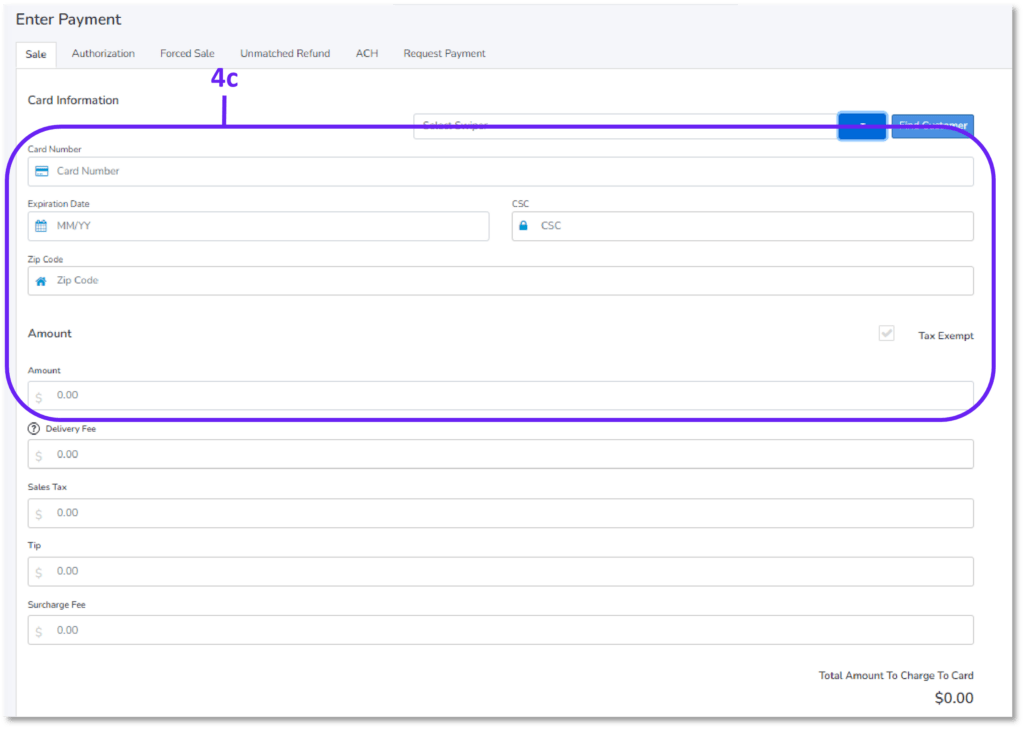
- Swipe, Dip, or Tap the card as needed. The Card Number and Expiration Date fields will lock with asterisks “****” showing for the card info was captured.
- If manually entering the details, you must complete the following fields:
- Card Number
- Expiration – MM/YY
- CSC – security code on the back or front of the card depending on card brand iv. Zip code – recommended but not required
- Amount – decimal point must be manually entered
- Please note, the transaction type options shown are based on the level of access the user has.
- For merchants enabled for ACH, select the ACH transaction tab, enter all required information including: a. Transaction type – credit debit
- Account type – checking/savings
- Account ownership type – corporate/personal
- Name on account
- Routing Number
- Account Number
- Amount – decimal point must be manually entered

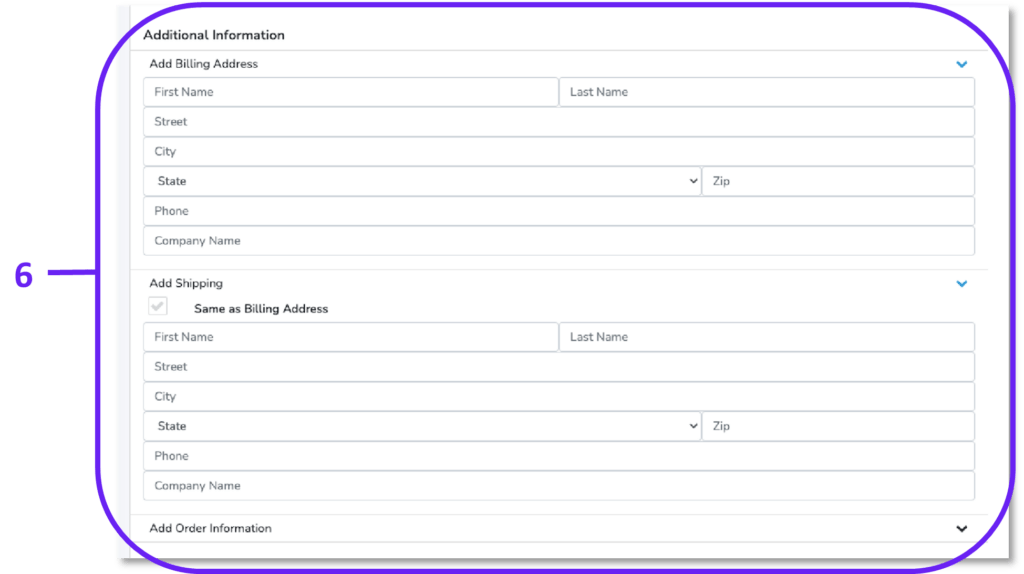
- For both credit and ACH transactions, an Additional Information section is available to collect more details related to the transaction. This includes the billing and shipping addresses, along with other order information.
Receipt Options
Once a transaction is successful, you can view then print or email the receipts from the Transaction Search page.
- Navigate to the Transaction Search page.
- The page shows all card transactions under the MID. Use the filters to help locate a specific transaction.
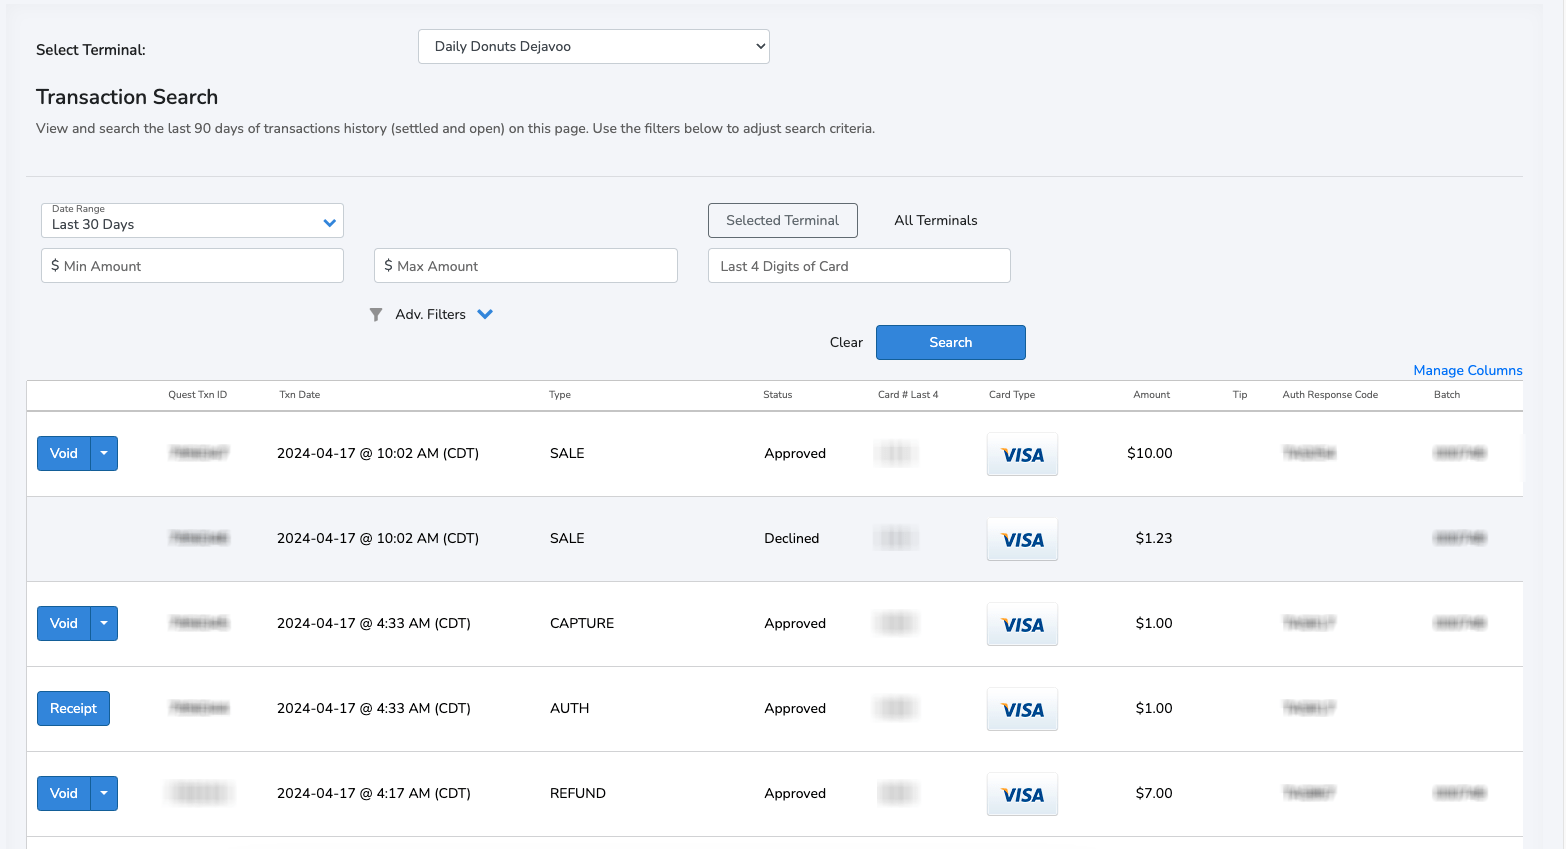
- Select a transaction to view its details, then view and print/email the receipt by clicking Print/Email Receipt button.
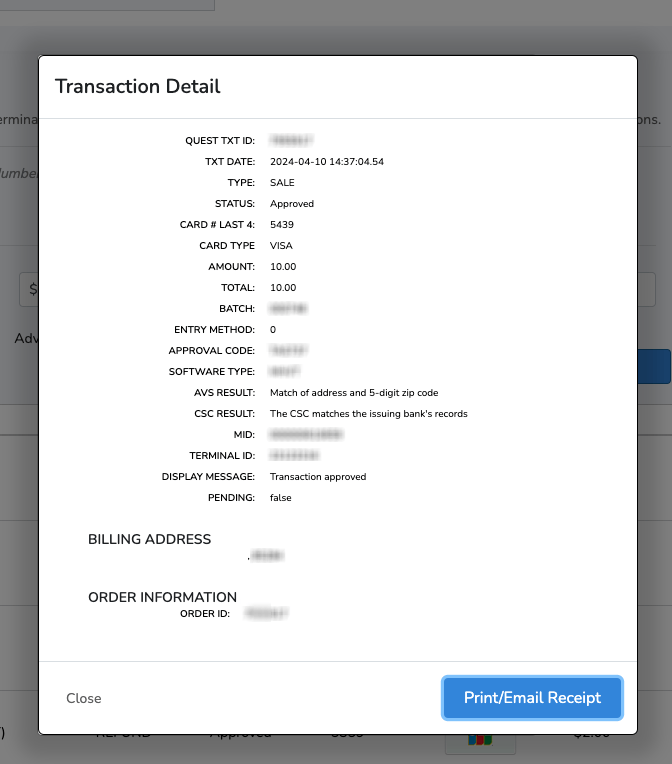
- The transaction receipt displays options to email or print the receipt.
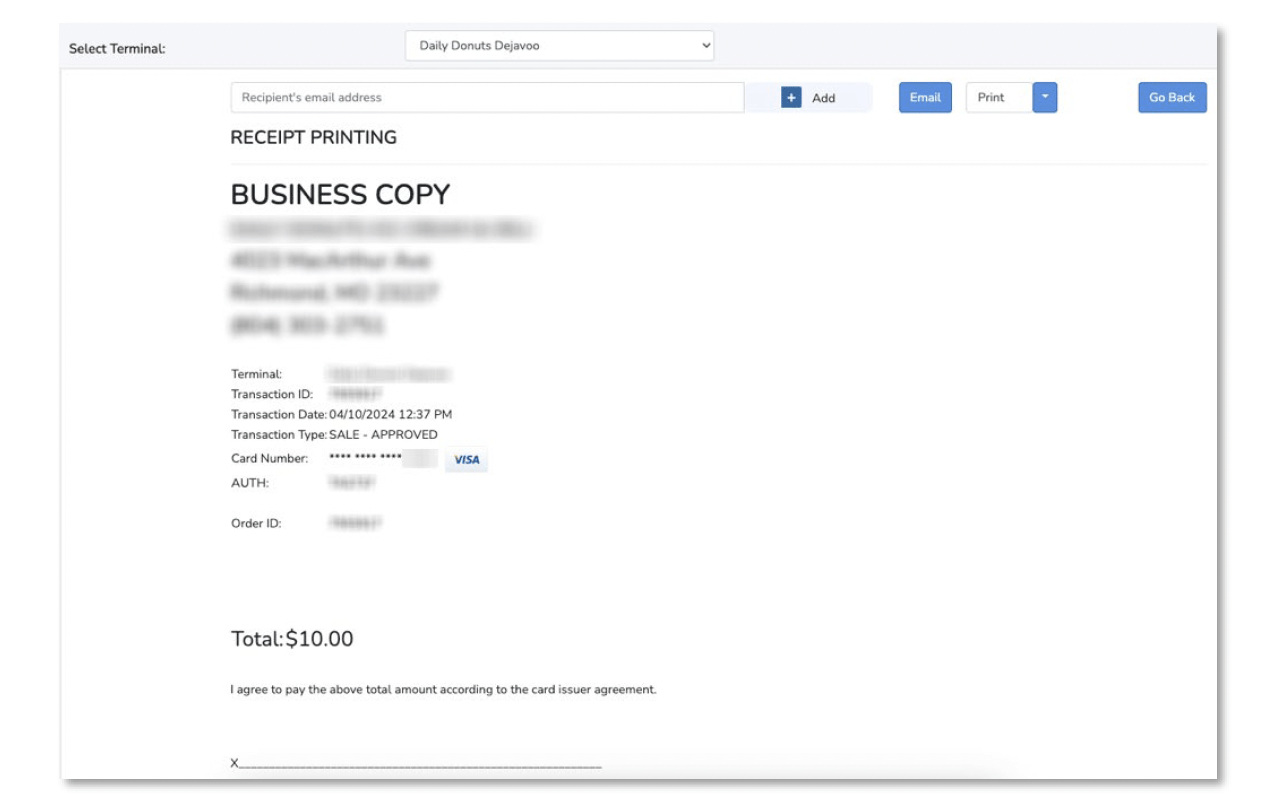
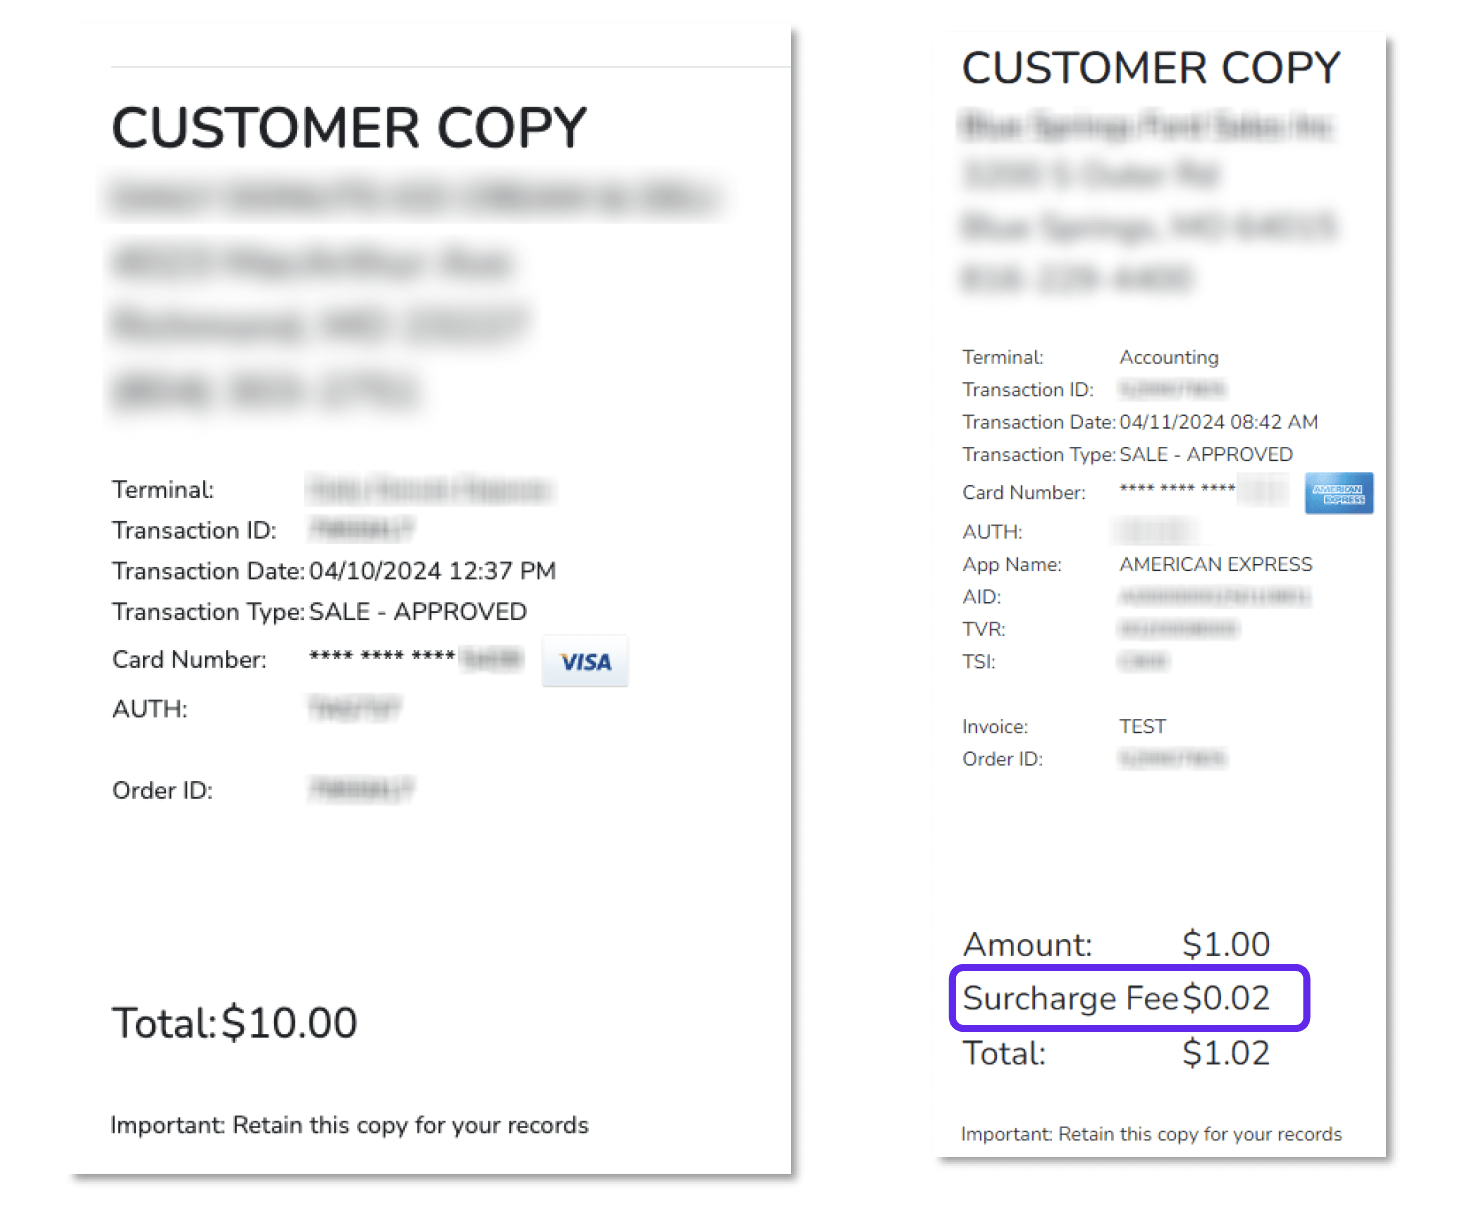
a. Example of a receipt with a surcharge showing:

- A customer copy of the receipt is also available at the bottom of the page (examples with and without surcharge):
Void a Transaction
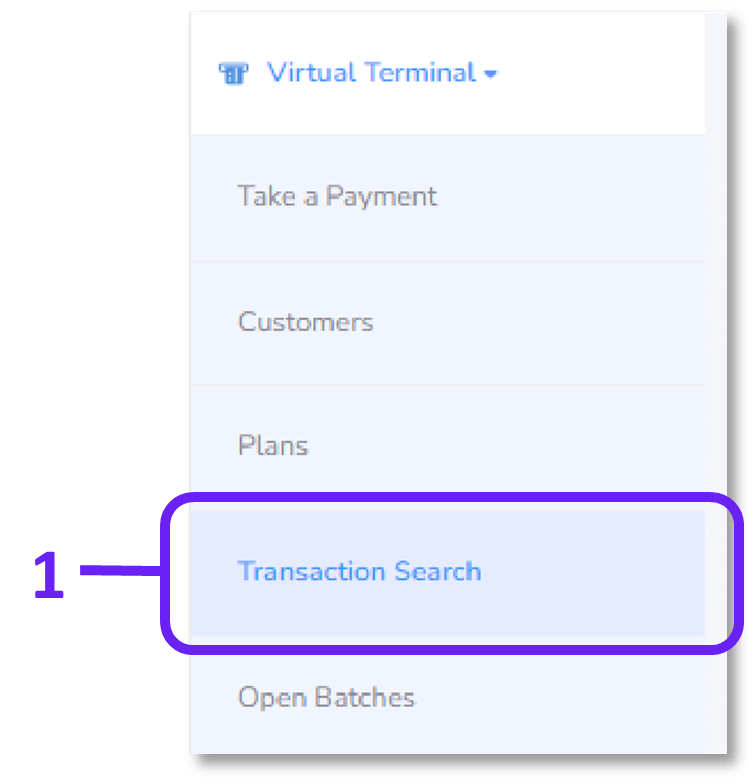
- Select Transaction Search from the Virtual Terminal section of the navigation.
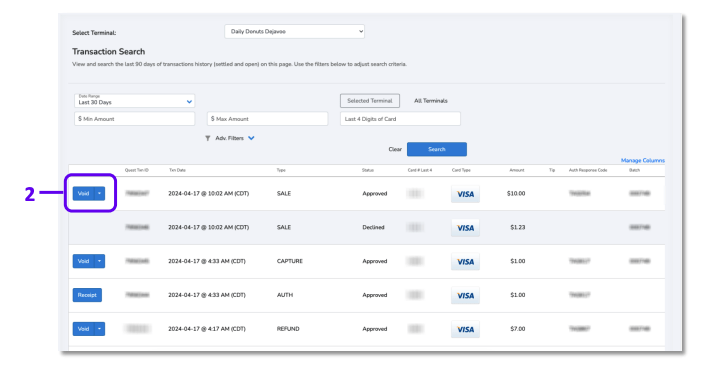
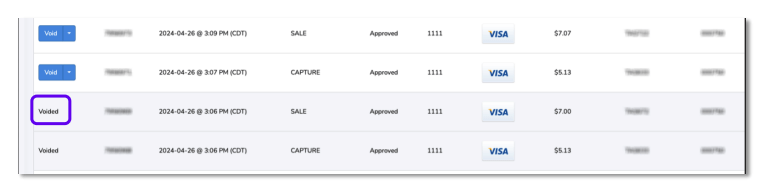
- On the transaction search page, you will see action options to the left of each transaction, select Void to begin that process.
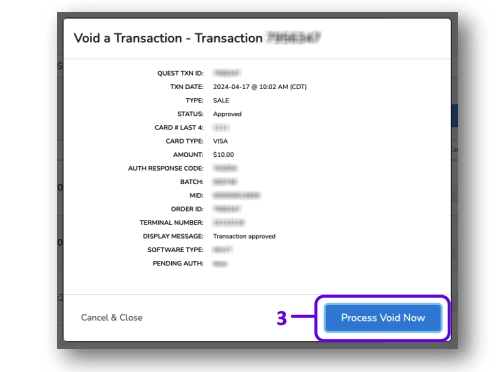
- From the transaction details, review the transaction details and click Process Void Now.
Refund a Transaction
There are two types of refunds, matched refunds and unmatched refunds. The refund described below is for a matched refund, which means that the refund is for a specific transaction and the card does not need to be represented in order to complete the refund. The amount of the refund can be for a partial amount or the entire transaction. It cannot be for more than the original transaction.
An unmatched refund is a credit on an account and is not related to any previous transaction. This type of transaction is also highly associated with employee fraud, so by default most users do not have the ability to perform unmatched refunds. If you need access to complete an unmatched refund, please contact the Clearent Support team for assistance.
- Locate the transaction you wish to refund by using the Transaction search filters.
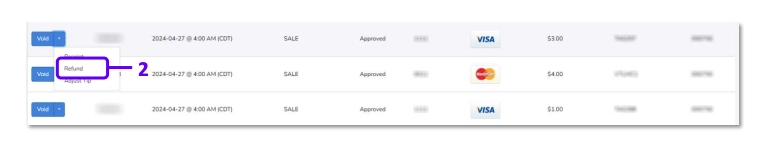
- Once you find the transaction, click on the actions option and select Refund.
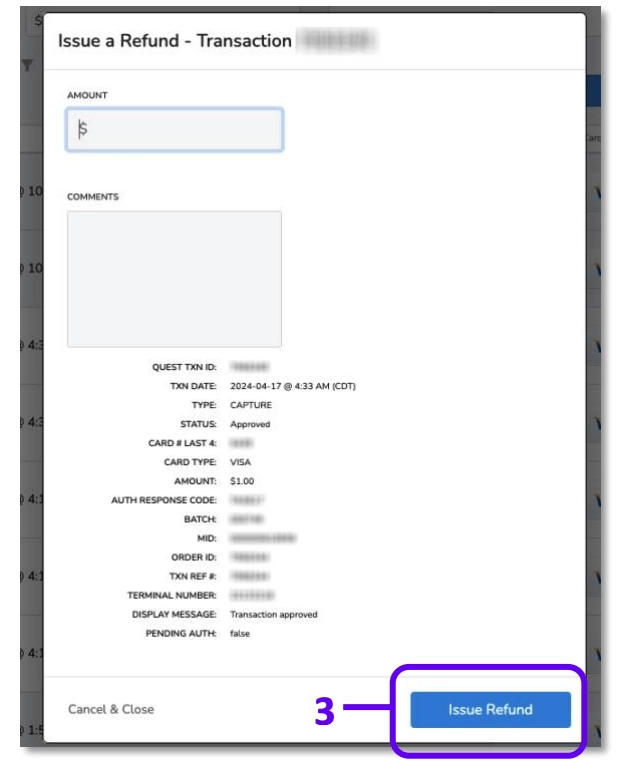
- The refund amount defaults to the full transaction amount. If you want to change the amount, simply click into the Amount field and change the amount. You can add notes to the transaction as well. Then click Issue Refund to complete the transaction.
Identify Pending Authorizations
Businesses that run authorizations and capture the amount at a later time can occasionally miss an authorization. Clearent has created a filter in the Transaction search to make sure that doesn’t happen to your business.
- Click on the Transaction Search in the Virtual Terminal menu on the sidebar.
- Click on Adv. Filters dropdown
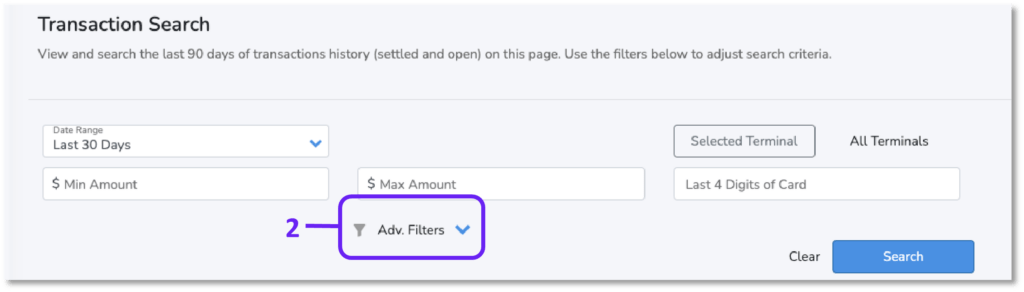
- In the Transaction Type filter click down and select Pending Auth
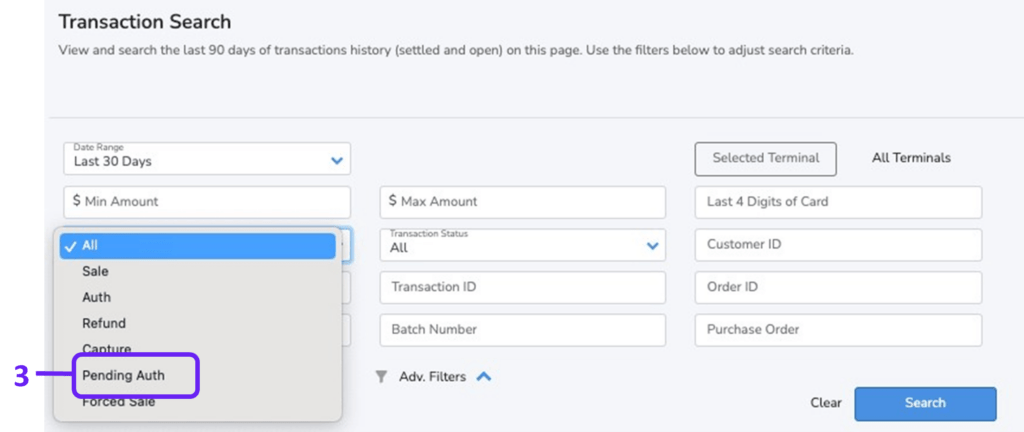
- The results will include transactions that have not been captured. You can capture an authorization for less than the full amount or the full amount. To capture over the full amount you can add a tip.
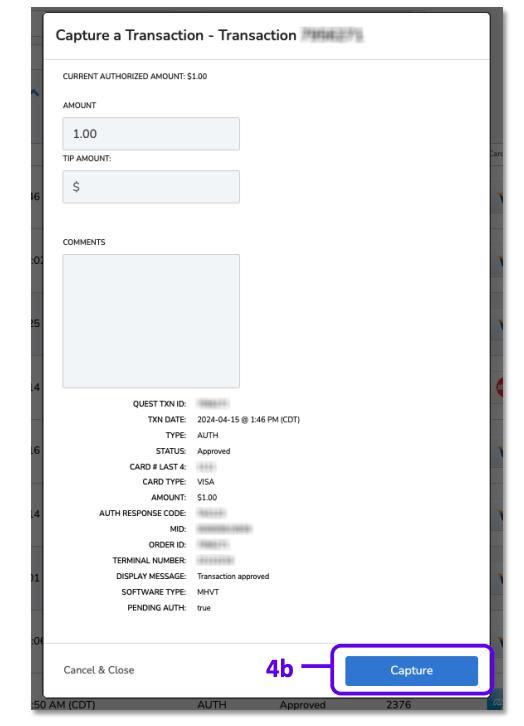
- Click the Capture button to the left of the transaction.
- When the Capture Details opens, adjust the amount as needed – entering a tip and adding a comment is optional. Click Capture to complete the capture process.

Recurring Payments
Clearent’s Virtual Terminal supports setting up recurring payments for your customers. Please note that this functionality is not enabled by default and requires additional setup. This guide will show you how to create a customer, add card details, and set up a recurring payment plan for the customer.
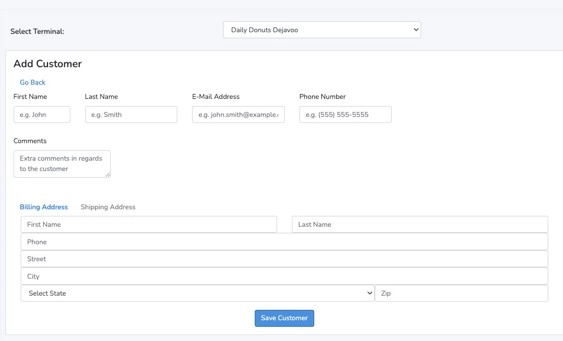
- Select Customers from the Virtual Terminal navigation.
- Select Add Customer.

- Enter the customer details and select Save Customer. First Name, Last Name, and Billing Address are required fields to save the customer.
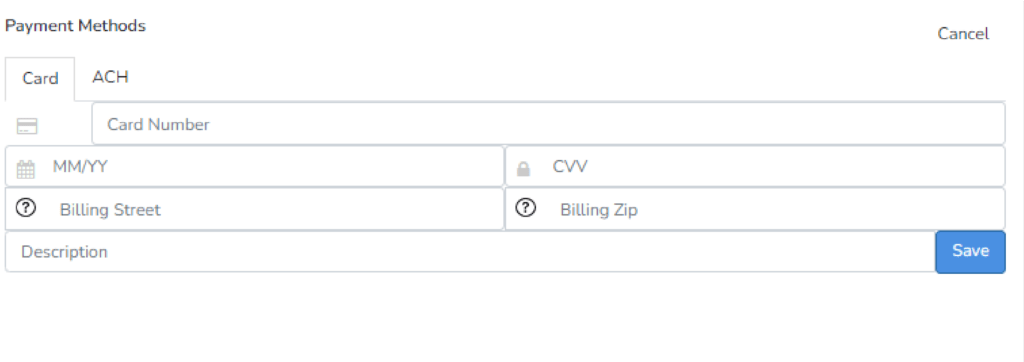
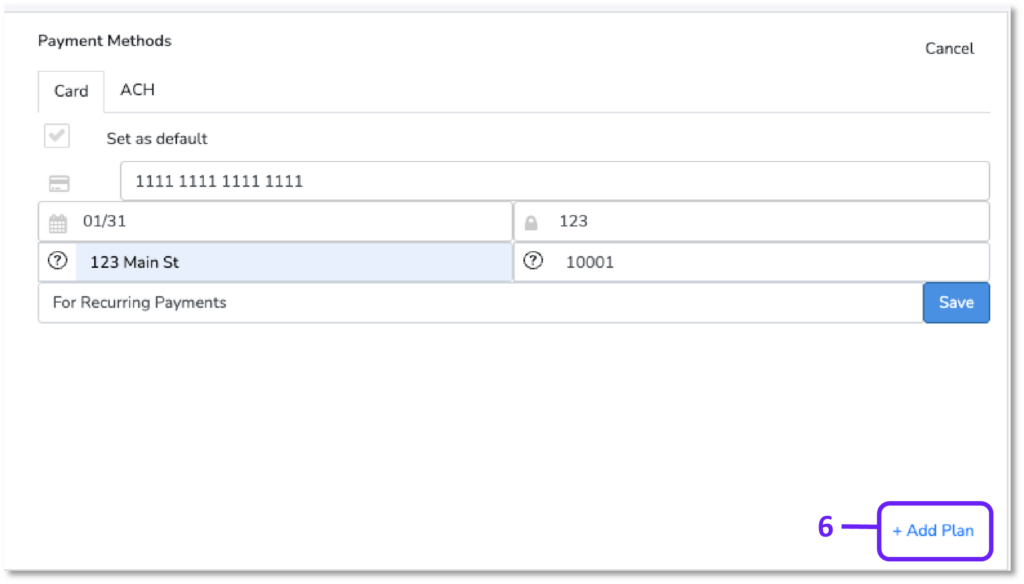
- Select Add under Payment Methods to add Credit Card or ACH details for the customer.

- Add customer card details and use the Description field to add a description that indicates the card is For Recurring Payments or something similar. Card number, MM/YY, and CVV are required, while billing street address, zip, and description are optional. Click Save when finished.
- Please note, selecting the ACH tab allows for ACH details to be saved for the customer. Account Type, Name on account, Routing and Account Numbers are required; description is optional.
- The next step is to add a plan for the customer. Select Add Plan shown on the bottom right in the image above.
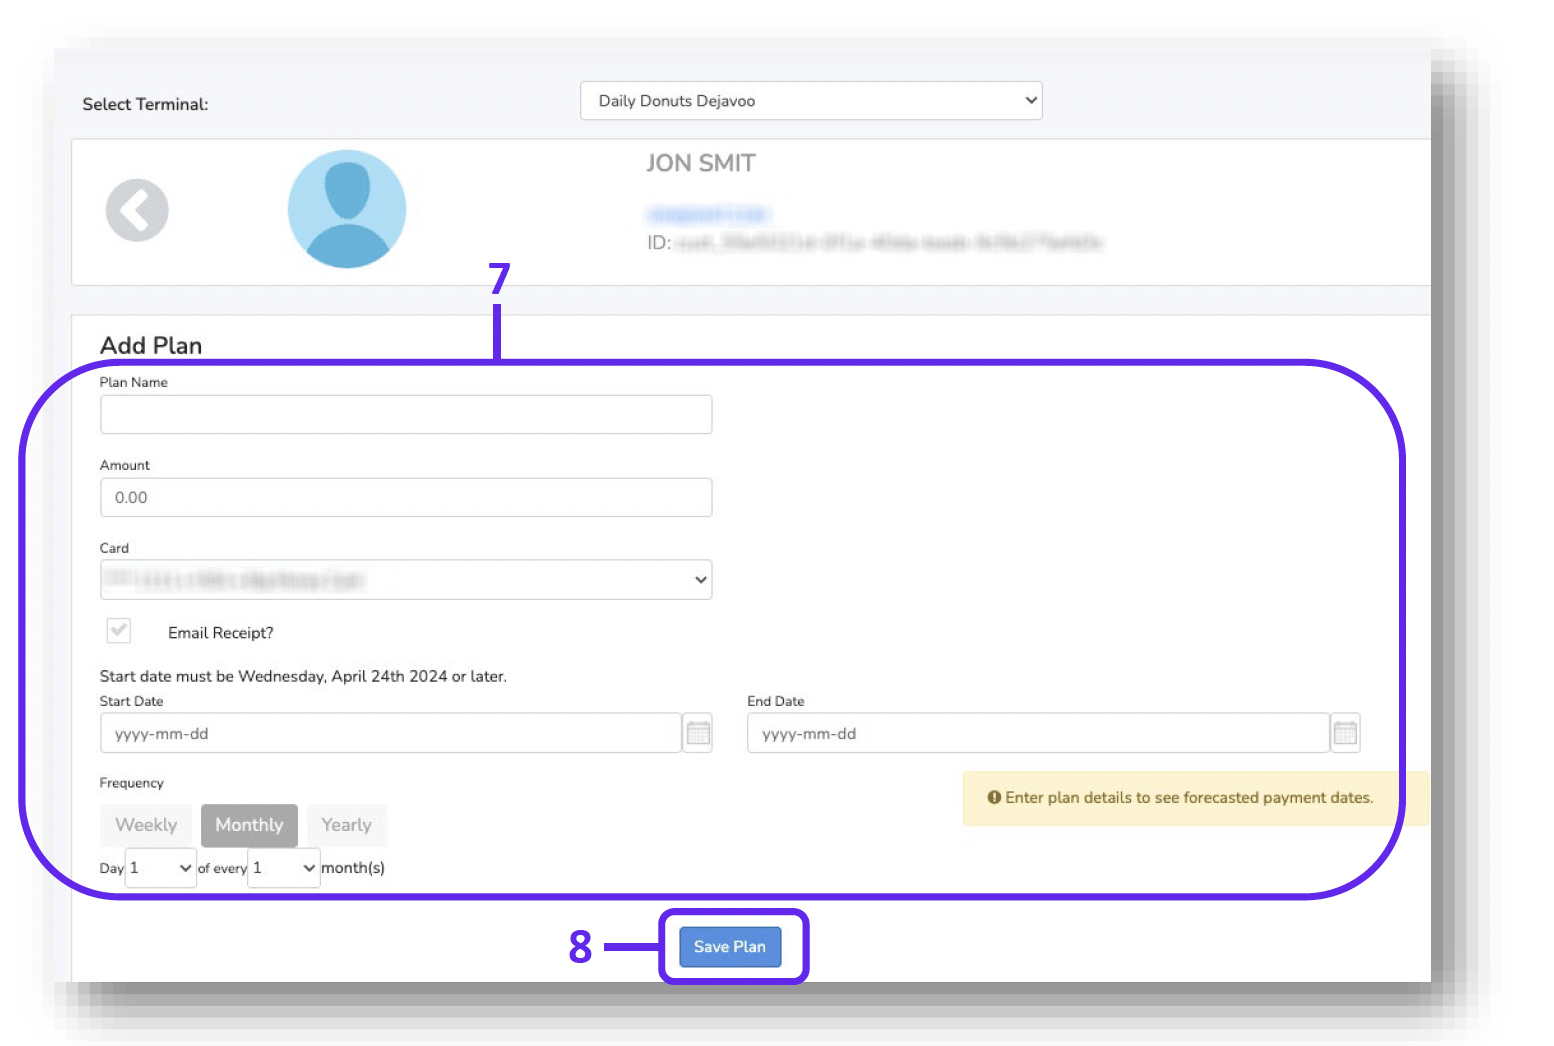
- Enter the plan details, amount to be charged, start and stop dates, and frequency of payment.
- Select Save Plan. The Virtual Terminal will automatically process the payment based on the plan settings.
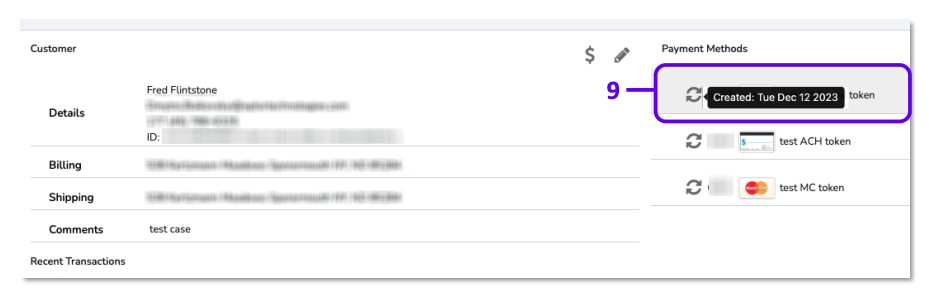
- If you are enrolled in Clearent’s Account Updater Service, Clearent will automatically scan and update out-of-date card data from Visa, Mastercard, and Amex. You can view when a card was last updated by hovering over the card on a customer page.
Ad-Hoc Card On File Payments
Clearent’s Virtual Terminal functionality supports processing ad-hoc payments for your customers who have a card on file stored. This section will show you how to process an ad-hoc payment for the customer.
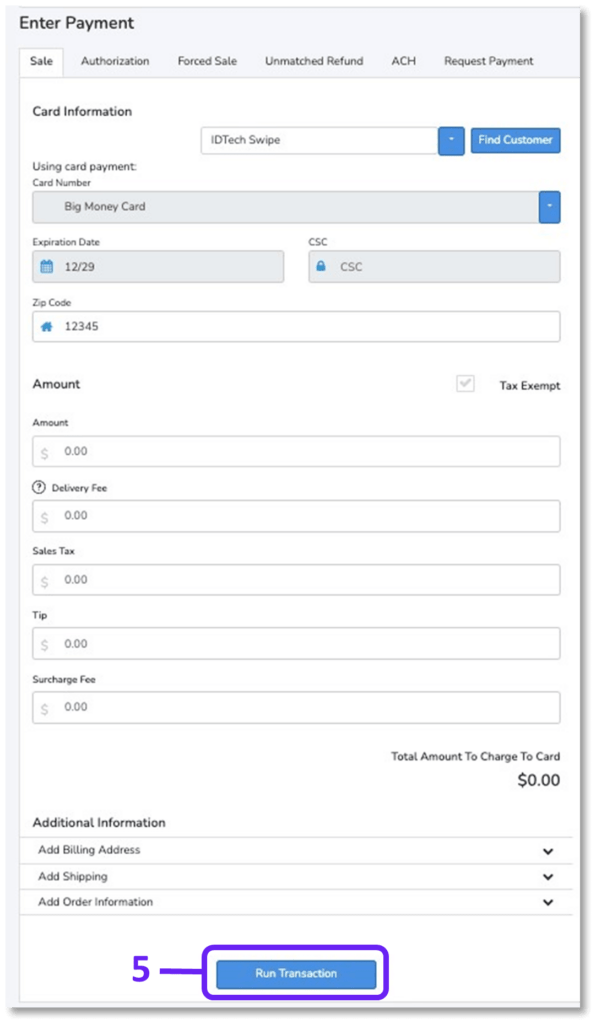
- Select Take a Payment from the main navigation.
- From the Sale tab, select Find Customer.

- Search for the customer for which you would like to process a payment.
- Select the $ icon on the right side of the customer and the card on file will populate into the Card Information fields.

- Add the amount to charge and enter any additional information as needed, then select Run Transaction.
VT Settings
Within the VT Settings tab the following options are available: Merchant Settings, Terminal Settings, External Terminal, AVS, CSC, HPP, Paylink and Customer Recurring Payments.
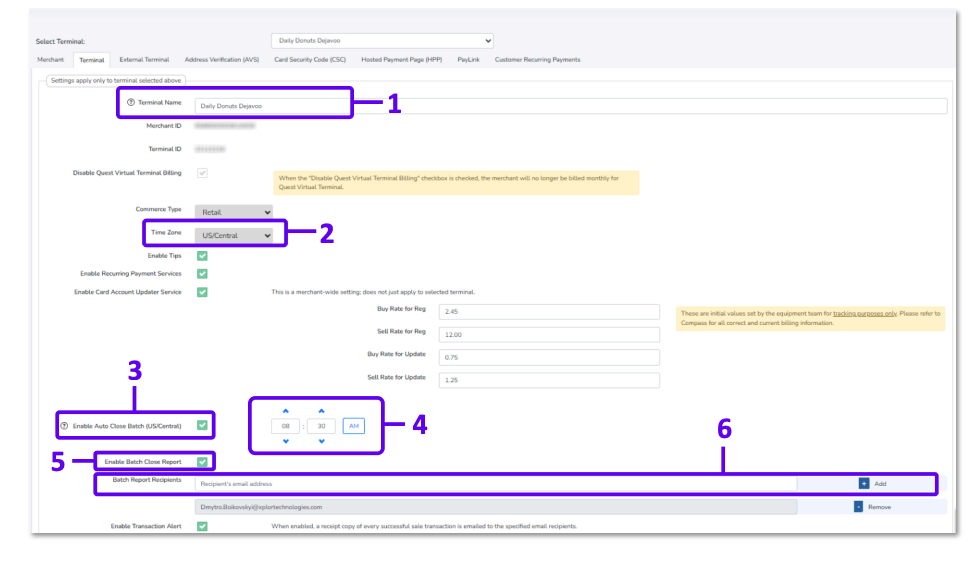
Key Terminal Settings include:
- Terminal Name – This is the terminal name used on receipts.
- Time Zone – This is the time zone displayed within the Virtual Terminal.
- Enable Auto Close Batch – When auto close is turned on, the Gateway will automatically submit the open batch of transactions for settlement at a designated time each day.
- Auto Close Batch Time – Select the time you want to auto close batches.
- Enable Batch Close Report – Select to enable automatic sending of daily batch reports via email.
- Batch Report Recipients – Enter and add the email address for each person who should receive the daily batch report
Address Verification (AVS)
Address Verification (AVS) is a security feature designed to reduce fraud. AVS helps ensure that the customer using the credit card is the actual owner of the card by matching the billing address entered with the address on file at the cardholder’s issuing bank. AVS information is also required to reduce processing costs for key entered, card not present, and e-commerce transactions.
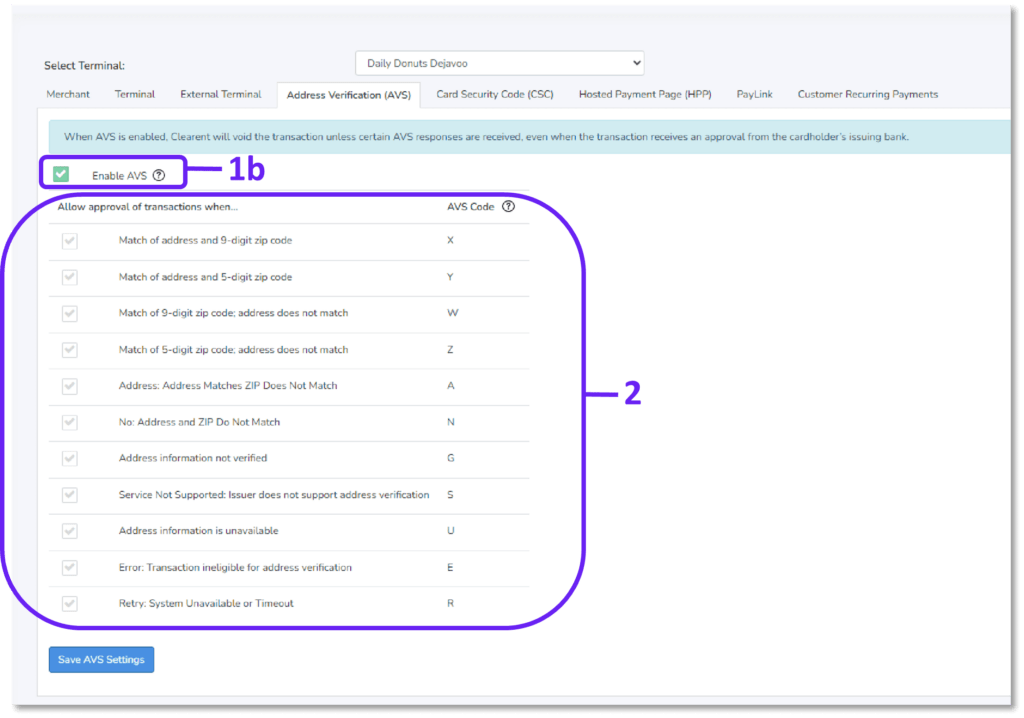
Within the “Address Verification (AVS)” tab the following options are available:
- Enable AVS – The default setting for AVS is Disabled.
- When AVS is disabled, Clearent will not stop transactions that receive an approval from the cardholder’s issuing bank. Clearent will send the address information if it is provided, which may be used by the bank in making its approval decision.
- When AVS is enabled, Clearent will void the transaction unless certain AVS responses are received, even when the transaction receives an approval from the cardholder’s issuing bank.
- If AVS is Enabled – The following AVS options will be selected by Default. For advanced users, these are the standard AVS response codes used by the payment networks and issuing banks.
Card Security Code (CSC)
Card Security Code (CSC) is a security feature to reduce fraud. The CSC is a 3 or 4-digit number on the card, which is used to verify that the customer has the card in his or her possession. The CSC is printed on the back of the card in the signature panel for Visa, MasterCard, and Discover. The CSC is printed on the front of American Express cards in the upper right. The
CSC has different names used by different networks. For example, Visa calls it the Card Verification Value (CVV2) and MasterCard calls it the Card Validation Code (CVC2).
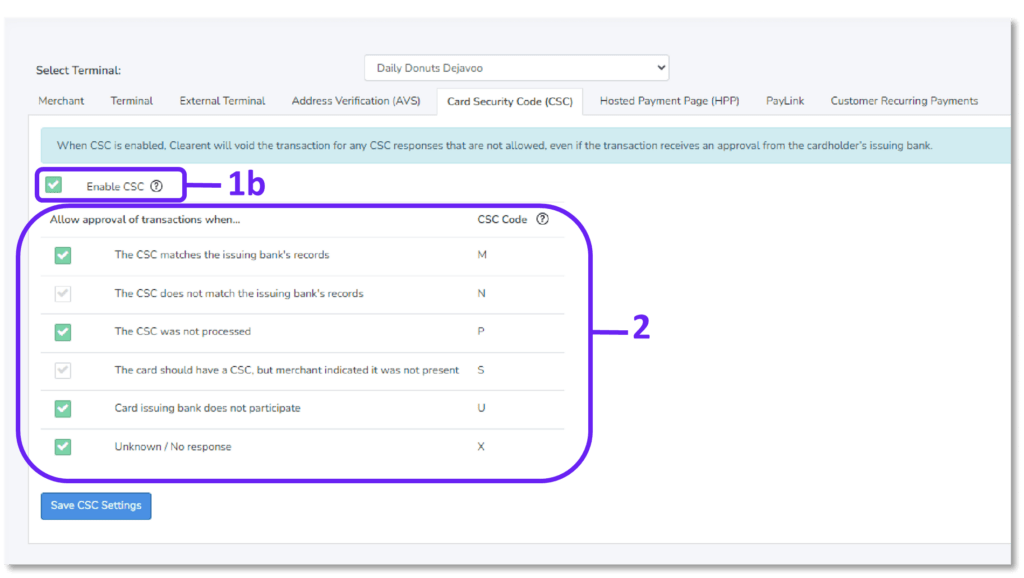
Within the “Card Security Code (CSC)” tab the following options are available:
- Enable CSC – The default setting for CSC is Disabled.
- When CSC is disabled, Clearent will not stop transactions that receive an approval from the cardholder’s issuing bank. Clearent will send the CSC if it is provided, which may be used by the bank in making its approval decision.
- When CSC is enabled, Clearent will void the transaction for any CSC responses that are not allowed, even if the transaction receives an approval from the cardholder’s issuing bank.
- If CSC is enabled – The following CSC options will be selected by default. For advanced users, these are the standard CSC response codes used by the payment networks and issuing banks
Hosted Payment Page (HPP)
If you have signed up for Clearent’s Hosted Payment Page (HPP) you will find this tab under Settings.
Within the “Hosted Payment Page (HPP)” tab the following options are available:
- Enable HPP – The default setting for HPP is Enabled and is initially set by our provisioning team.
- To disable HPP uncheck the Enabled box and select “Save Hosted Payment Settings.”
- Hosted Payment Page Domain – This is the website URL where you will use the Hosted Payment Page. This is initially set by our provisioning team.
- To change the website URL, replace the URL in the dialog box and select “Save Hosted Payment Settings.”
- Public Key – You will to use this public key in your code so we can link your Hosted Payment Page to your account. Please do not publish this key outside of your code.
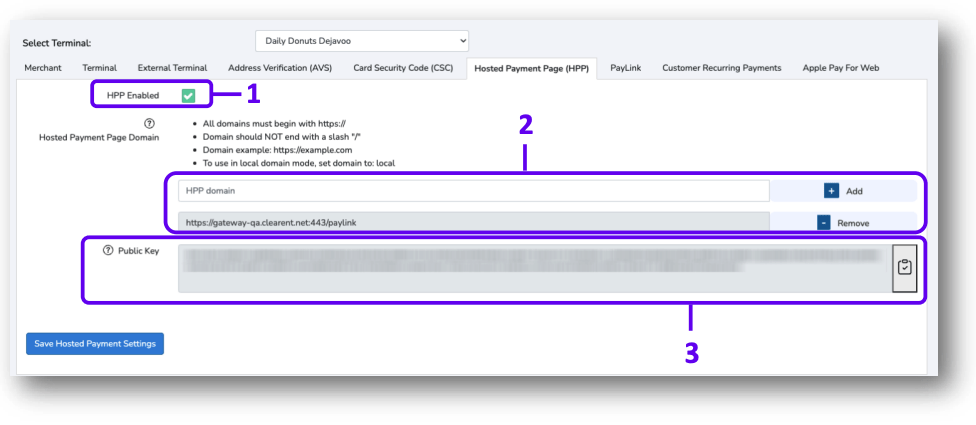
To copy the public key to your clipboard, select the clipboard icon on the far right.
Paylink
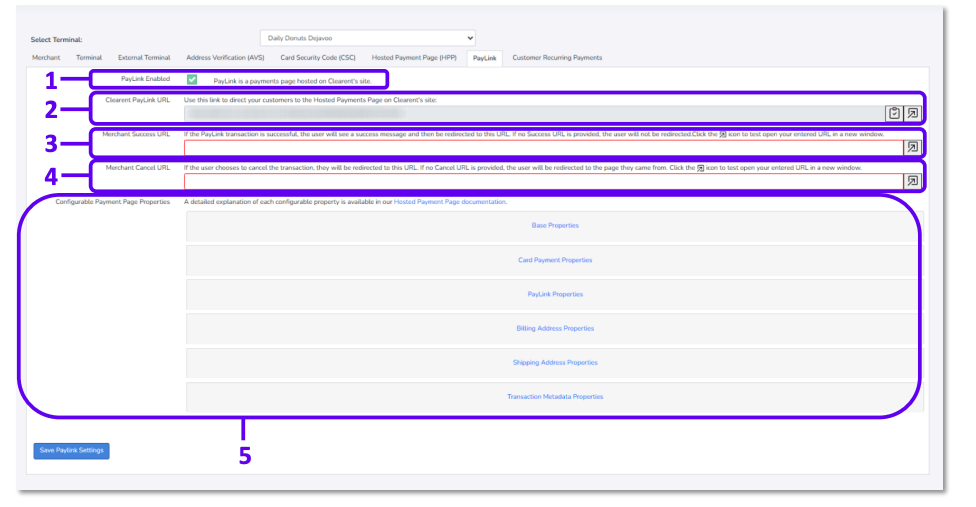
Another tab that is available is the Paylink tab that allows for easy transfer of funds between two parties. Below is a look at the Paylink page on VT.
- Paylink Enabled – Allows user to toggle Paylink on/off
- Clearent Paylink URL – Redirect customers to an HPP page on Clearent
- Merchant Success URL – URL that customers will be redirected to when a transaction is successful
- Merchant Cancel URL – URL that customers will be redirected to when a transaction fails
- Configurable Properties – More granular settings on properties that can be edited
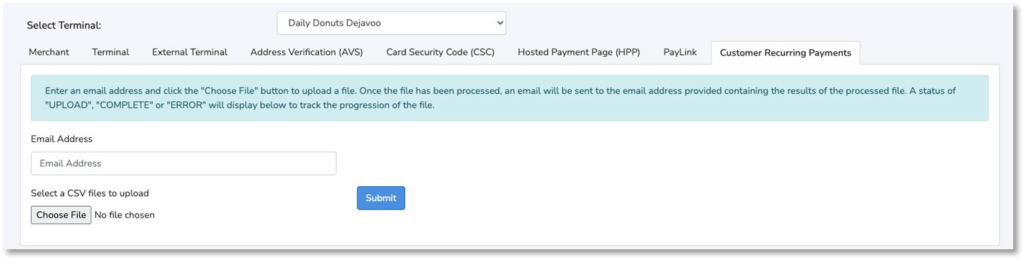
Customer Recurring Payments
Under the Customer Recurring Payments tab, you can review all existing recurring payment customers. Follow the instructions shown on the page to upload a CSV of customers, a token assignment to each customer and the recurring plan that each customer is tied to.
Virtual Terminal DEMO Video
Have questions or need assistance? Please contact our dedicated support team.
Our experts are here to help you navigate any challenges or inquiries you may have regarding virtual terminal functionality in the merchant portal or any other aspect of our Clearent applications.