Overview
This guide is designed to provide an overview of Merchant Home and all associated features. Some of the great features include:
- Real Time Transaction Reporting (Quest Only)
- Take actions on voids, refunds, tip adjusts for users with VT access
- Clear reconciliation views
- Easy PCI access and status updates
- Mobile friendly design
- New technology which allows for future feature set growth
Today’s Stats
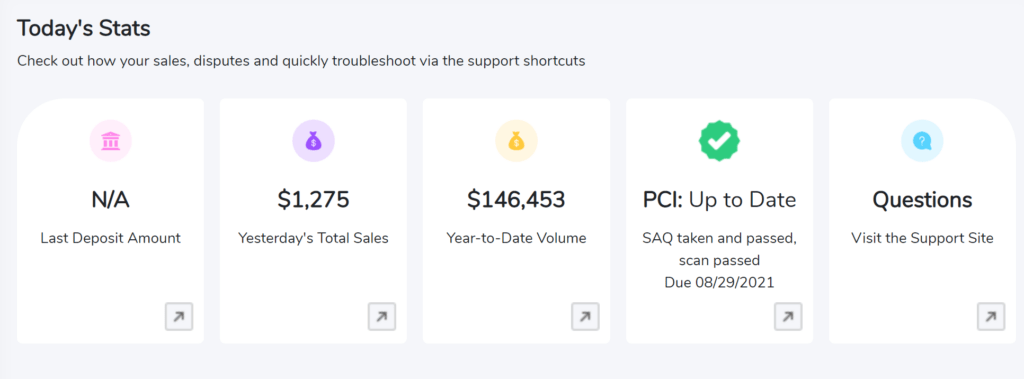
Once you are logged in to Merchant Home, you will immediately see a section titled “Today’s Stats” which give you immediate access to the following:
- Last Deposit Amount
- Yesterday’s Total Sales
- Year-to=Date Volume
- PCI Status
- Direct link to search for questions and answers at the Support Site
To provide the most seamless user experience, each time a user logs in to Merchant Home, they will see the data for the same Merchant ID previously viewed.
Sales Volume
Easily view month over month total volume.

Merchant Home
- Open Batches – View daily volume, business stats, and access detailed batch and transaction information by location
- Users have the option to Close a Batch from this section
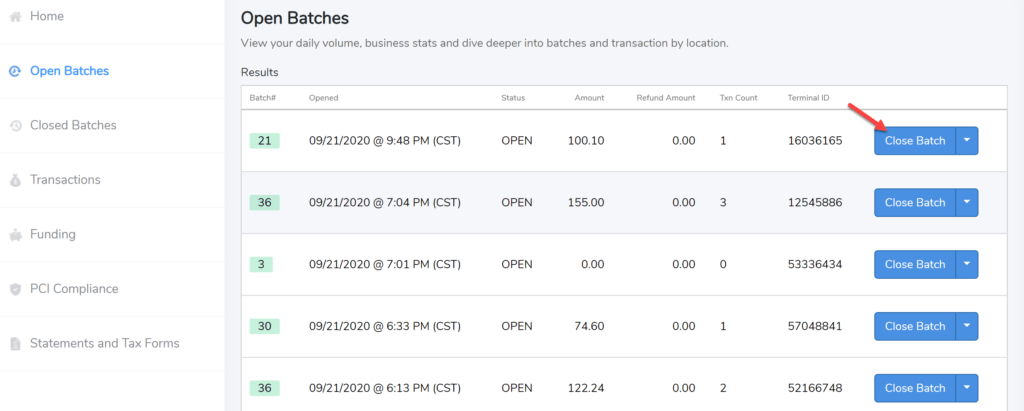
- Users also have the option to view all transactions associated with an open batch

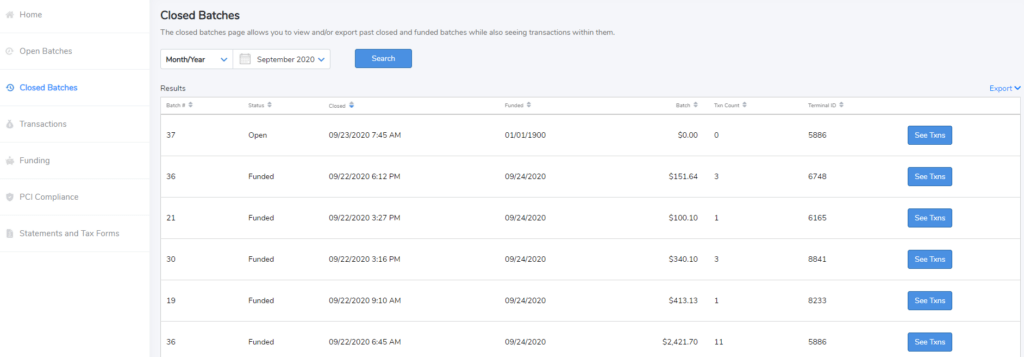
- Closed Batches – View closed and funded batches while also seeing transactions within them
- Users may also export data from this view
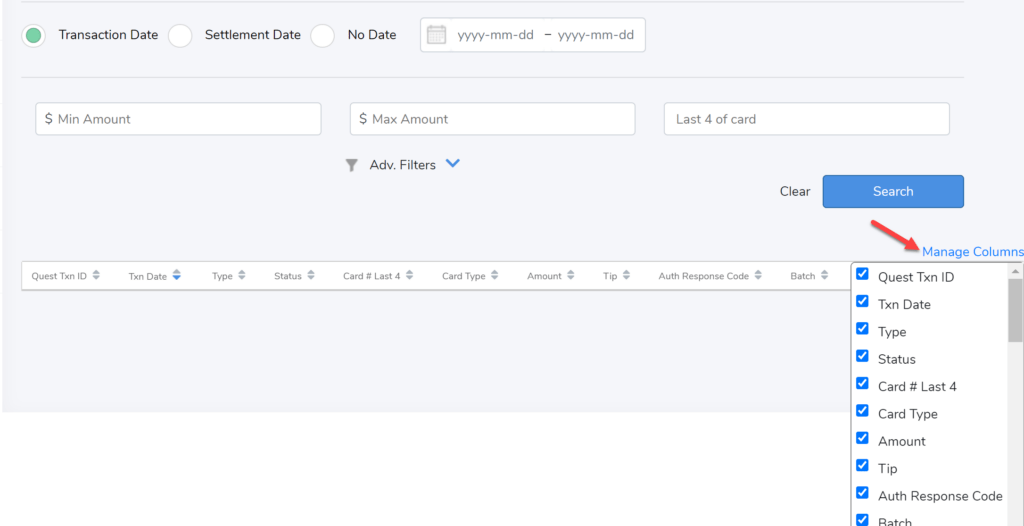
- Transactions – View and search transaction information across all terminals
- Users can customize views to see the information that is most important to them
- Custom filters automatically save
- Users can customize views to see the information that is most important to them

- Click Manage Columns to display the data each unique user wants to see
- Users simply need to click Manage Columns and then check or uncheck the columns they would like to display
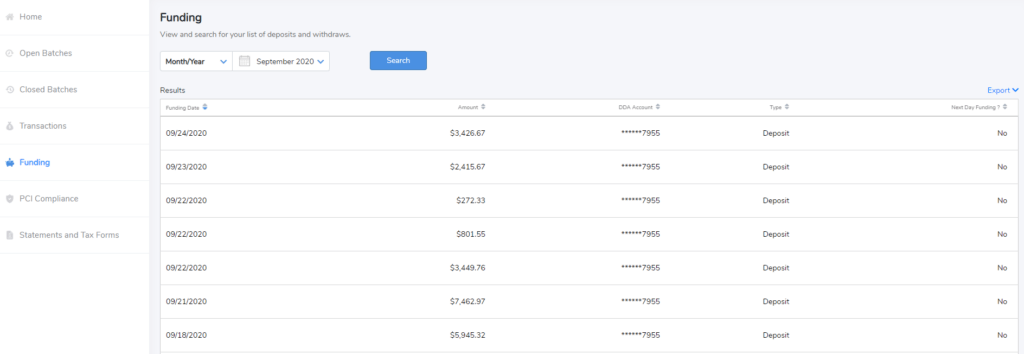
- Funding – Complete view of deposits and withdrawal information
- Users can customize date range as needed
- Virtual Terminal – Take a Payment
- Interface providing options to allow users to manually initiate credit card payment transactions and enter details by hand.
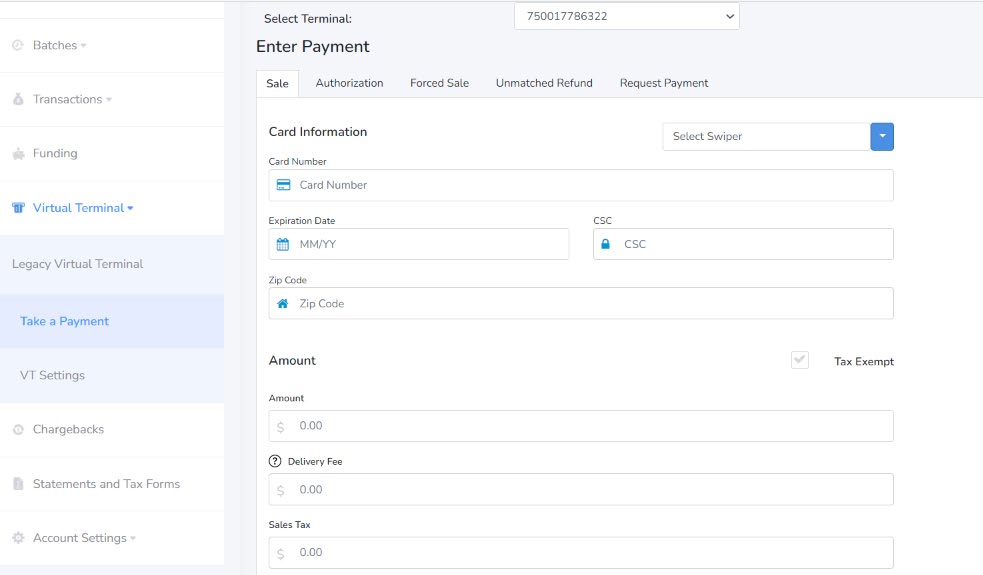
- Once a merchant ID and a terminal ID is selected, users click on the respective tabs and input details to satisfy the payment type (Sale, Authorization, Force Sales, Unmatched Refund, Request Payment) transaction they want to perform.
- VT Settings – Conveniently access and specify the information fields you would like to include or require for transactions submitted using the Virtual Terminal.
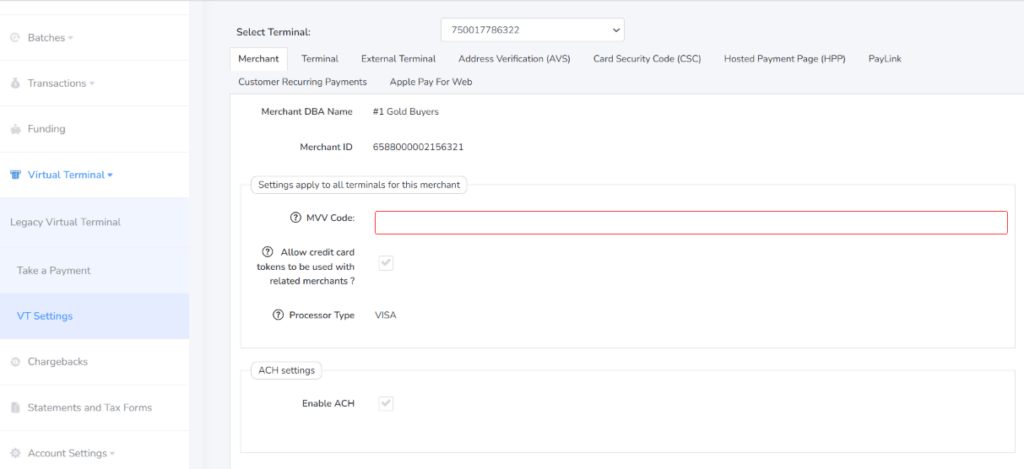
- For some conditions, these settings apply to all terminals for a given merchant. Otherwise, requirements and specifications will be called out accordingly in a teal information box as shown below:

- Chargebacks – View and search results of specific chargeback details in this area.

- Users can filter down by a selected Month/Year, specified Date Range, and preset dates. Upon execution of a search, users can even perform an Export of the data selected at this view.
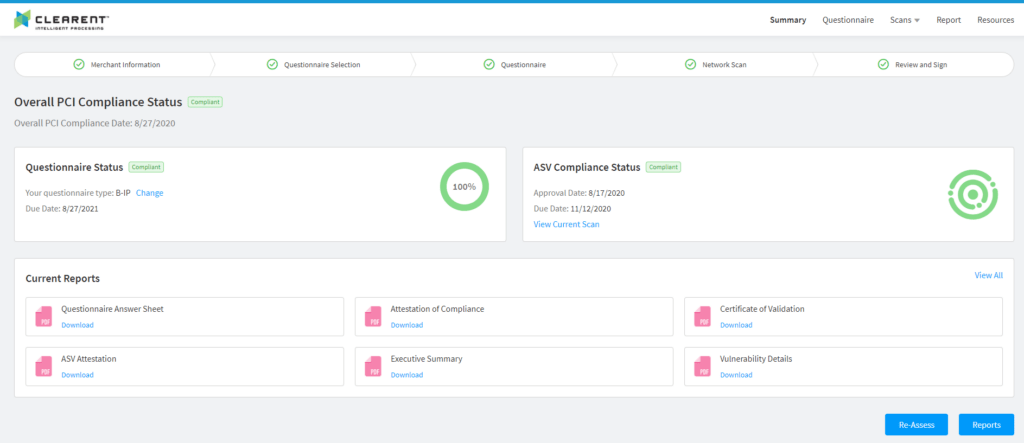
- PCI Compliance – View overall compliance status including Due Date
- Statements and Tax Forms – Easily access individual statements and/or tax forms
- Users have the option to download all available statements or only the one(s) they select

- Account Settings –
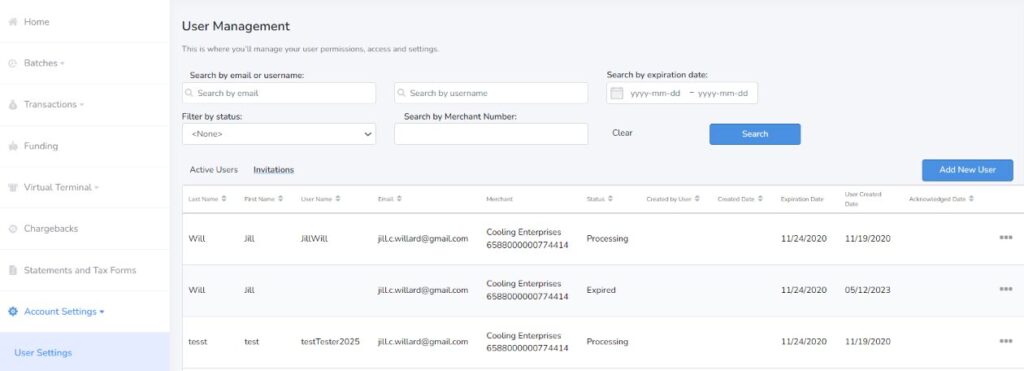
- User Settings: This section permits the manageability of User permissions, access, and settings that include maintenance by username or by email. Users can be added here, and there is the ability to view Active users and Invitations.
- Bank Account Settings: This section permits the handling of bank settings to define banking transactions that are subject to approval flow and transmission to our system.
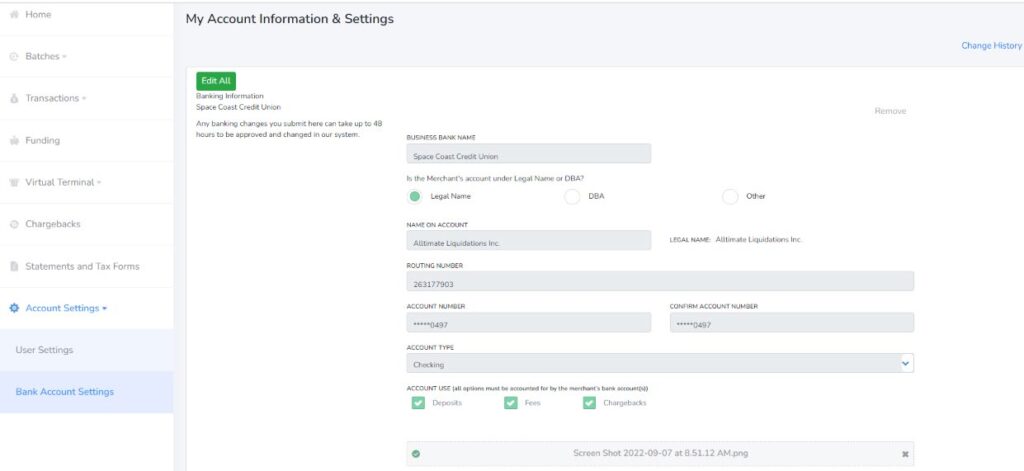
- On this view, the Change History tab allows for a view into tracked historical settings that have been performed. Clicking on the More tab will provide a display of the actual details of proposed vs. Original Bank Account(s) details.
